
Don’t have the time (or budget!) to take the multi-day hike to the summit of Mount Kenya…but still want to spend a day exploring Mt. Kenya National Park to admire its snow-capped peaks and beautiful valleys? Then read on for our recommendation of the best & most beautiful 1-day hike in Mount Kenya National Park. Plus how you can hike in the park without a guide!
As the second highest mountain in Africa, it should come as no surprise that Mount Kenya is absolutely stunning and well worth a visit if you’re in Kenya – particularly as it’s just a few hours away from Kenya’s capital city, Nairobi!

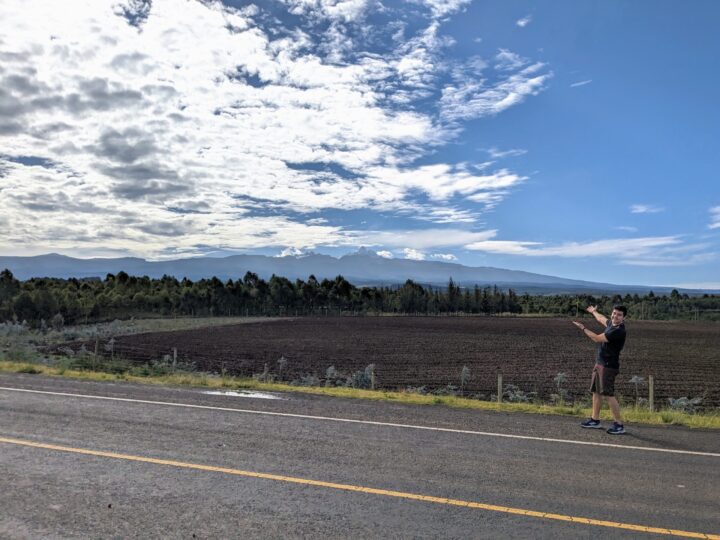
Rodrigo was *very* excited to spot the peaks of Mount Kenya from a distance!
But before I dive into today’s article, I want to lead with a caveat: this article is NOT about how you can hike to the *top* of Mount Kenya in 1 day, nor about how you can hike all the way to the *summit* independently.
Given the altitude and the distance from the base of the mountain to the summit (which is about 60-70 kilometers/38-43 miles roundtrip and reaches heights of nearly 5,000 meters/16,000+ feet), it is simply NOT possible nor safe to attempt reaching the top in a day.
(Not to mention, the Kenya government also mandates that you have a guide to reach the summit.)
Rather, today’s article is meant for those of you who, like us, didn’t have the time (at least 5 to 7 days) or the budget (upwards of $1,000 USD) to opt for a guided tour all the way to the top of Mount Kenya…but who still want to spend a day or so exploring the national park and admiring the dramatic snow-covered peaks independently.
With this in mind, we’ll be sharing the best day hike you can do in Mt. Kenya National Park and how you can undertake said hike *without* a guide. (It’s a little more complicated than you might expect, so I recommend carefully reading through our step-by-step Mt. Kenya day hike guide & itinerary below!)
Before our own trip, we found it challenging to get details on how to do a day hike in Mount Kenya National Park without a guide. So if you’re in the same boat, then we put together this article to help.
So, let’s dive in!
Table of Contents
- 1 What are the hiking/trail options in Mount Kenya National Park?
- 2 What are the options for day hikes/trails in Mount Kenya National Park?
- 3 What’s the best 1-day hike in Mount Kenya National Park?
- 4 How long is the Mount Kenya Day Hike starting from Sirimon Gate? And how much altitude gain is there?
- 5 How much does it cost to do a day hike in Mt. Kenya National Park?
- 6 How to get to Mt. Kenya National Park
- 7 How to do a day hike in Mount Kenya National Park without a guide (step-by-step directions starting from Sirimon Gate)
- 8 HOW TO BUY YOUR TICKET FOR A KENYAN NATIONAL PARK
- 9 In conclusion…
What are the hiking/trail options in Mount Kenya National Park?
Whether you plan to take a multi-day hike to the summit or simply a day hike (as we’ll be talking about in today’s article), you’ll have one of six entrances to the national park to choose from.
However, the 3 most popular routes up to Mt. Kenya (in other words, the 3 routes that 90% of hikers take) start from Sirimon Gate to the northwest of the peak, Naro Moru Gate to the west, and Chogoria Gate to the southeast.

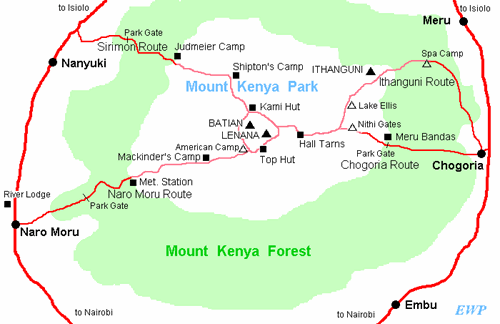
Map of the main Mount Kenya National Park trails, park entrances, mountain huts, and landmarks (highest peaks are referenced by the triangles in the middle). Photo courtesy of AdventureAlternative.com.
Although there are a few other possible routes and park entrances to consider, we’ll go ahead and skip those here. Since this article is focused on day hikes in Mt. Kenya National Park, you won’t be taking those other routes anyway as A) they are more remote and thus less safe to do independently, and B) they won’t give you the best views if you only have 1 day.
What are the options for day hikes/trails in Mount Kenya National Park?
As far as we could tell, there are really only 2 route options that would make sense to consider for a day hike (i.e. there are only 2 routes that will get you somewhere with great views in just 1 day) in Mount Kenya National Park – the Naro Moru route or the Sirimon route.
The first option starts by entering the park through Naro Moru Gate to the west of the mountain, hiking up past the Met Station, and heading in the direction of Mackinders Camp (though you’ll turn around before this) for incredible views of the moorlands, rock formations, and eventually the peaks.
(Note you can pick out many of these points on the map linked above!)
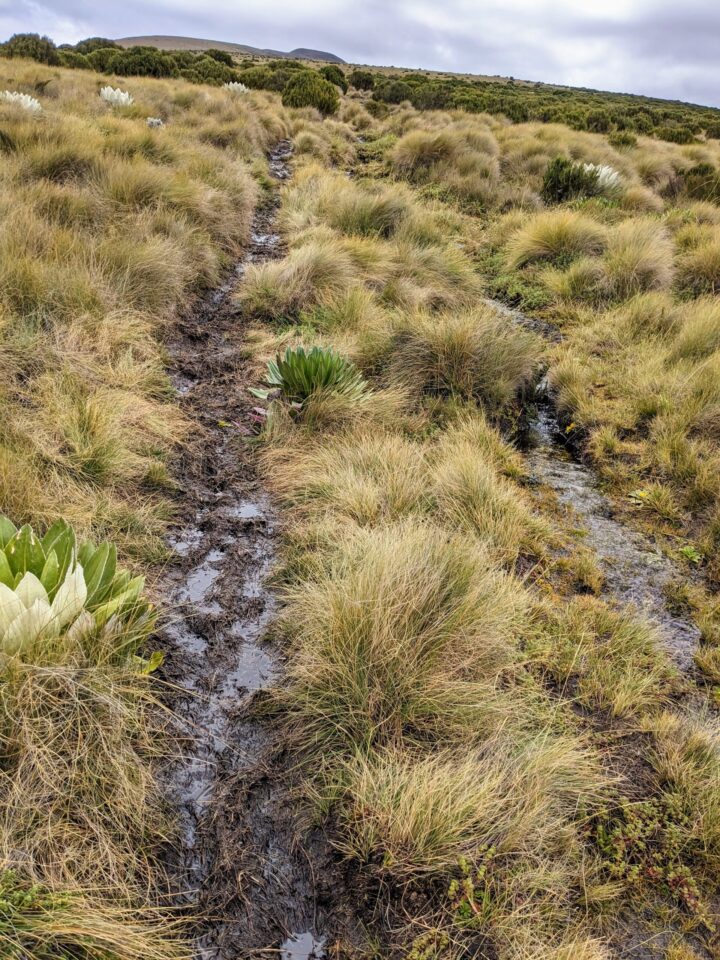
However, we decided to skip this particular trail ourselves as we heard that the Naro Moru route starts with a bog area that gets very waterlogged (and is thus a total pain to walk in) during the rainy season, which is when we were there.
So I’m afraid I’m not able to offer any additional insights about this particular day hike!
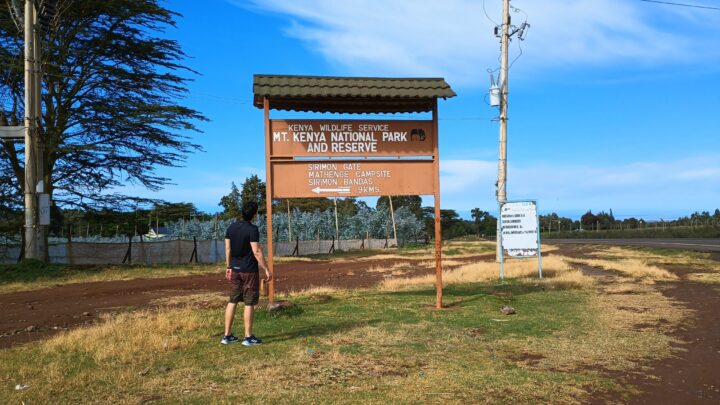
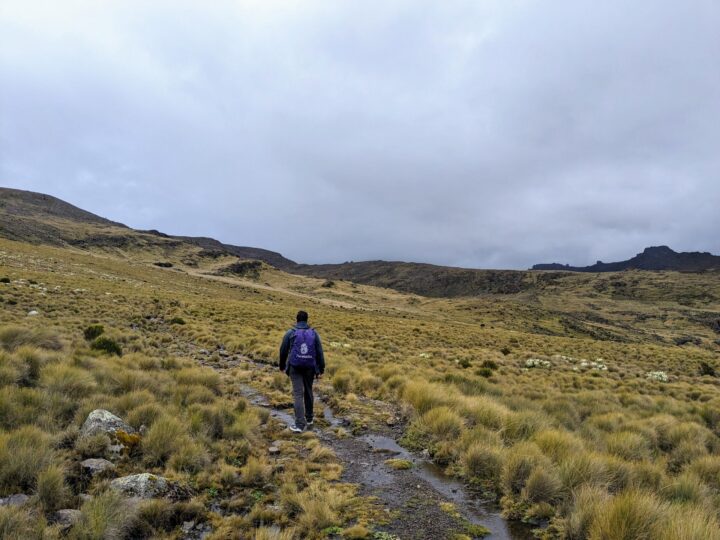
We recommend you start your day hike in Mount Kenya National Park at Sirimon Gate
Because of this, we recommend the second day hike option (which is the one we took and enjoyed) that starts by entering Sirimon Gate in the northwest and heading toward Shipton Camp up through the moorlands, several ridges, and to a beautiful viewpoint of the peaks.
Which brings us to the next section for some more details.
What’s the best 1-day hike in Mount Kenya National Park?
As we mentioned above, in our personal opinion, taking the Sirimon route is the best choice for a day hike in Mount Kenya National Park.
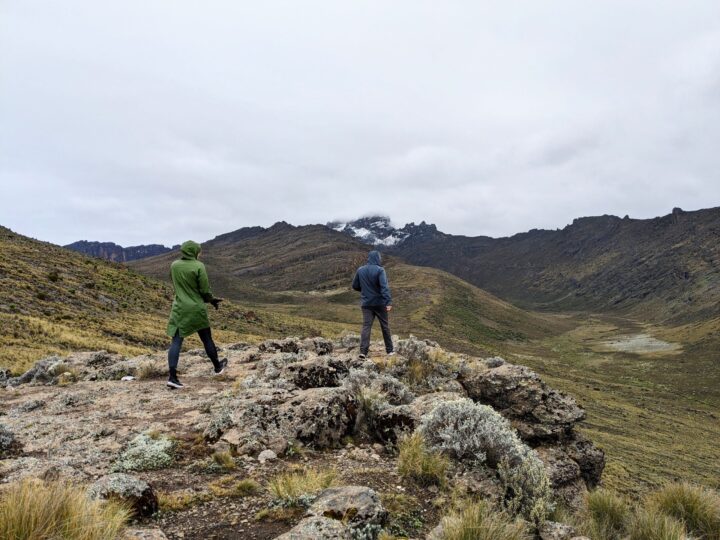
Now, the bad news is that this particular day hike doesn’t have a specific name. (For reference, we asked around for the name of the major viewpoint of the peaks you’ll have at the end of this hike, and we were told it’s just called “the viewpoint.”)
Unfortunately, the clouds were covering the peaks by the time we got to the top of our hike. Still a beautiful view from “the viewpoint,” though!
However, the good news is that this day hike is still pretty easy to figure out as it begins at the popular Sirimon Gate and follows the same route that hikers going all the way to the summit would take.
If that feels a little vague to you, don’t worry because I’ll walk you through all the specifics in the “step-by-step instructions” section below. ![]()

How long is the Mount Kenya Day Hike starting from Sirimon Gate? And how much altitude gain is there?
Although the trail starting from Sirimon Hike is very much an “official” trail, given that it makes up part of the multi-day hike to the summit, it’s not officially designated as a “day” hike.
So, it was a bit challenging for us to get exact stats for this particular day hike.
It’s important to note that you can technically turn around whenever you like (though the final “viewpoint” you reach before turning around is pretty spectacular, if you can make it there).
However, based on our best estimate, from Old Moses Camp up to “the viewpoint,” we covered somewhere between 6-8 miles and had nearly 1,000 meters of elevation gain.
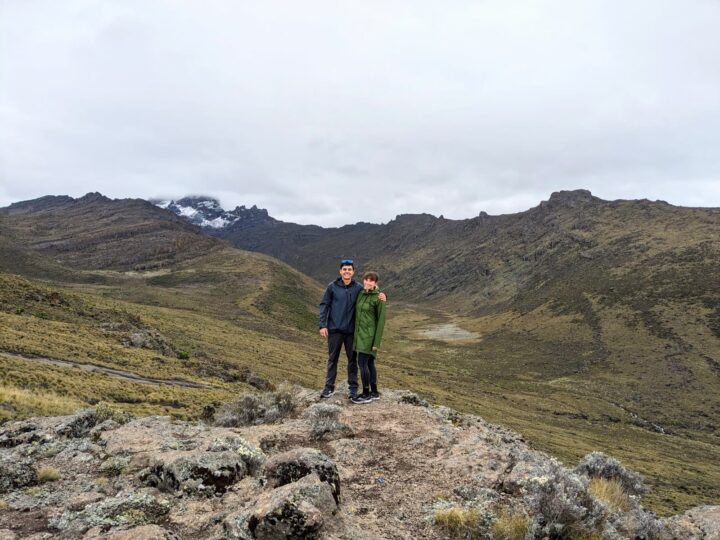
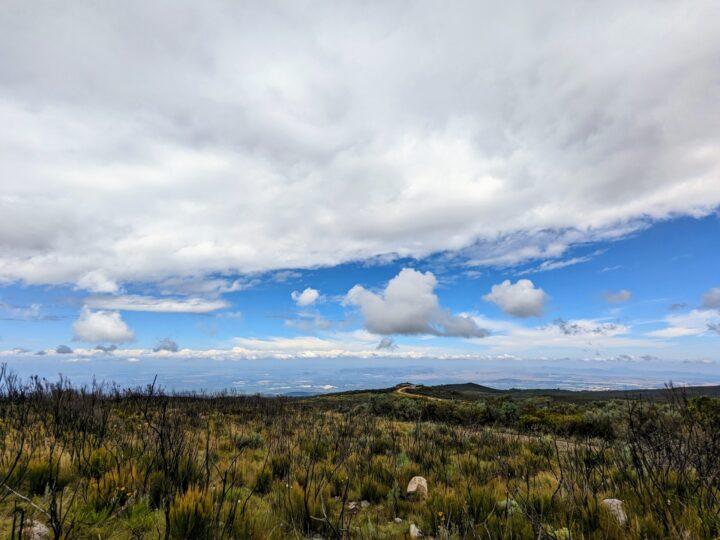
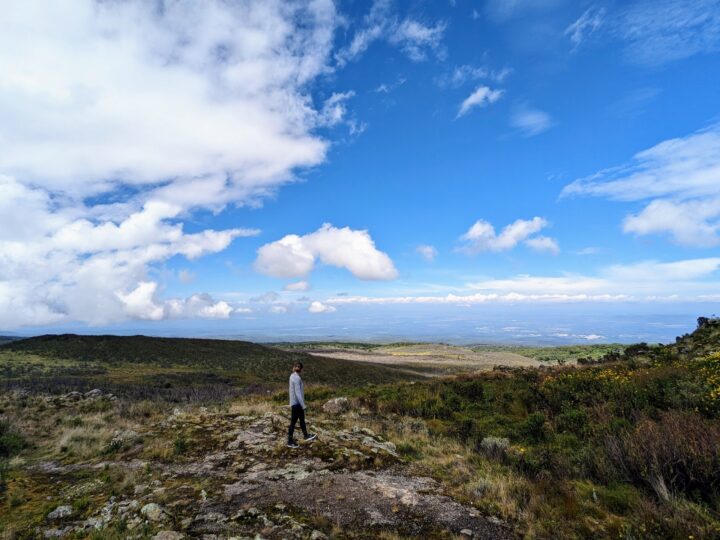
Views in Mount Kenya National Park
We are almost positive we made it above 4,000 meters (AKA definitely enough to feel the altitude!) before we turned around again.
This entire hike took us about 4-5 hours in total, but I imagine the time can vary significantly.
Though we are usually pretty quick hikers, we went slower than usual on this particular hike because A) the ground was very muddy, wet, and slippery at the beginning (plus, we only had regular tennis shoes rather than hiking boots…which I would not recommend!), and B) I was seeing spots and my tongue/one side of my face was going numb from the altitude (whoops). So, we decided to stay quite a while at the viewpoint and then take it easy on the way back.

The mud definitely slowed us down a bit (and this wasn’t the worst of it!)
(Side note: don’t underestimate the effects of the altitude during this hike! Especially if you don’t have a lot of acclimatization time, which you likely won’t since this is just a day hike.)
How much does it cost to do a day hike in Mt. Kenya National Park?
Honestly, even without a guide, a day hike in Mt. Kenya National Park leans toward the expensive side.
We spent $100 USD in total (or $50 USD per person) for a 1-day entrance ticket to the national park, which feels like a lot for a day hike. Not just for Kenya, but for most places in the world!
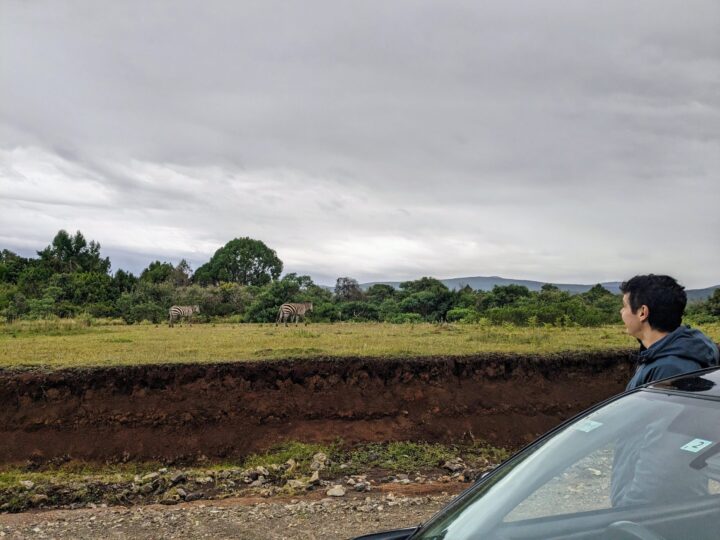
Keep your eyes out on your way to Mount Kenya National Park…you just never know what you might find 🙂
(After all, you can get an annual national park pass for about $70 USD in the U.S. which will give you access to all 60+ parks in the country for an entire year!)
So while I’m still glad we did the hike, it’s worth mentioning that just because you’re hiking independently here doesn’t necessarily make it a super budget-friendly trip.
How to get to Mt. Kenya National Park
Personally, we rented a car for most of our 10 days in Kenya, so we simply drove to Mt. Kenya (or rather Nanyuki, where we spent the night before our hike) from Nairobi.
However, as you’ll see me mention a few times throughout the article (and which seems important to mention a few times for the sake of transparency!), I really wouldn’t recommend renting a car in Kenya as a tourist since we had lots of negative experiences.
With this in mind, the easiest and quickest way to get from Nairobi to Nanyuki (the “gateway” to Mount Kenya) would be by taking a local matatu.


You’ll find matatus everywhere in Kenya!
You can find the Nairobi-Nanyuki matatus on Accra Road in Nairobi (though I recommend double-checking this first!). The matatus leave frequently (basically whenever they fill up), the trip takes 3-4 hours, and the trip costs just a few dollars.
Alternatively, for a unique experience, there is also a weekly train you can take. The train takes about 7 hours and goes from Nairobi-Nanyuki on Friday and then Nanyuki to Nairobi on Sunday.
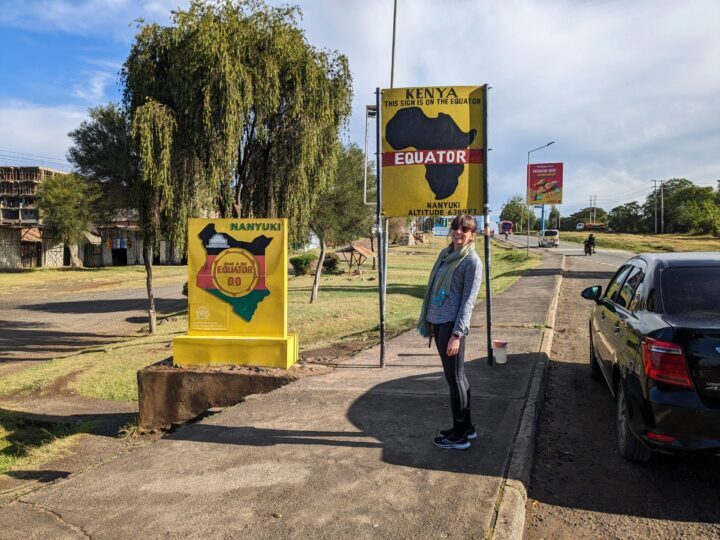
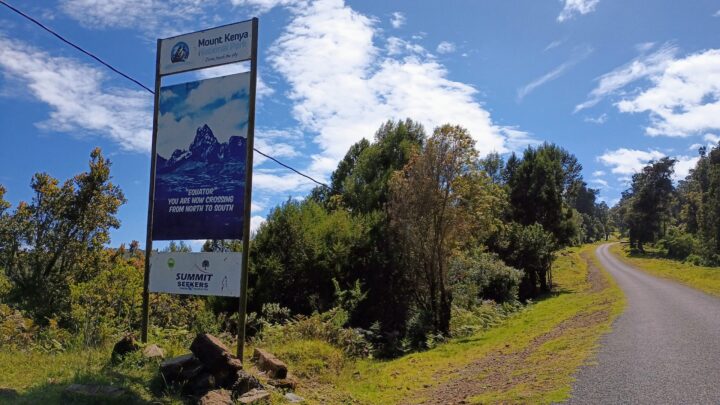
Fun fact: Nanyuki, the city where you’ll likely stay before/after your hike, is right on the equator!
How to do a day hike in Mount Kenya National Park without a guide (step-by-step directions starting from Sirimon Gate)
STEP #1: GET YOUR ENTRANCE TICKET TO MT. KENYA NATIONAL PARK BEFORE YOUR ARRIVAL SINCE CREDIT CARDS AND CASH ARE NOT ACCEPTED AT THE ENTRANCE GATE.
Despite many sources (including Kenyan government sources) telling us we could easily pay our national park entrance fee at the park’s entrance gate, on arrival we were told that the credit card machine was “broken.”
(Side note: we were told this a *lot* throughout our trip in Kenya, not just at Mt. Kenya!)
It’s also not possible to pay the entrance fee with cash (due to safety concerns with the park not wanting to keep a lot of cash on hand since the park fees are quite high, I imagine).
So, what’s your alternative?
Well…
HOW TO BUY YOUR TICKET FOR A KENYAN NATIONAL PARK
Though there seems to be quite a lot of conflicting information online, based on our experience visiting Mt. Kenya National Park and other government-run visitor sites (like museums and other national parks), it is NOT possible to pay your entrance fees with credit card or cash.
The preferred payment method in Kenya is a mobile app called M-PESA, which is something like the Kenya version of Paypal and which is used widely for transactions of all kinds across the country.
While it’s a great system…it’s not likely to be something you’ll have set up as a tourist.
(It is worth mentioning here that in SOME cases, if you have enough cash on hand, you may be able to pay cash to the entrance staff and then have them use their M-PESA account to buy your ticket. However, we’d recommend against this as that would require you to walk around with a lot of cash on hand – not the best idea in Kenya – as entrance fees are quite steep.)
Which means that, if you’re a tourist in Kenya without M-PESA, then your ONE option to pay for your park fees will be to create an account on Kenya’s e-Citizen government platform.
If you prefer, you can also download the app to your phone (just search “Kenya e-Citizen” through your app store).
Through e-Citizen, you’ll be able to create a “foreigner”/“visitor to Kenya” account that you can use to pay your entrance fee for all of Kenya’s national parks (including Mt. Kenya National Park, of course), as well as many of the country’s museums.
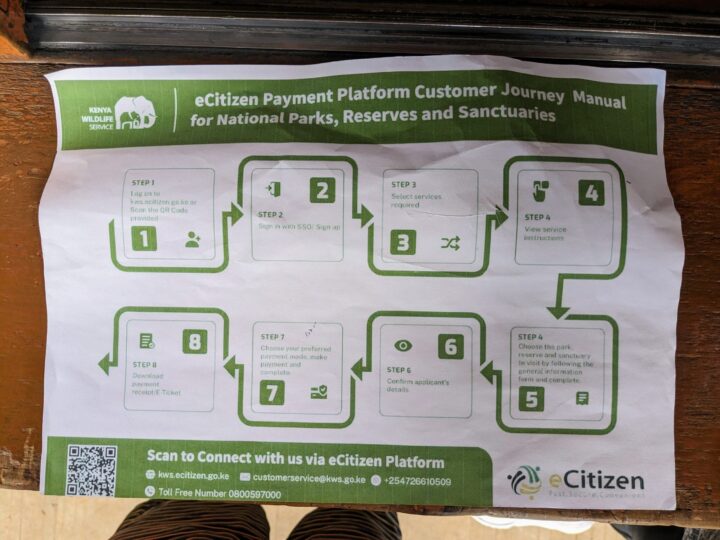
In our experience, Kenya’s e-Citizen system is convenient and relatively easy to use.
However, it’s a bit glitchy and it’s not always clear when you need to use it (for example, despite quite a lot of pre-trip research, we had no idea that e-Citizen was the only way we’d be able to pay to get into Mt. Kenya National Park).
IMPORTANT NOTE ON USING THE E-CITIZEN PLATFORM TO BUY YOUR NATIONAL PARK TICKETS IN KENYA
I strongly recommend you get your e-Citizen account set up and that you buy your park tickets *before* you make your way to Mt. Kenya (or any other national park, for that matter).

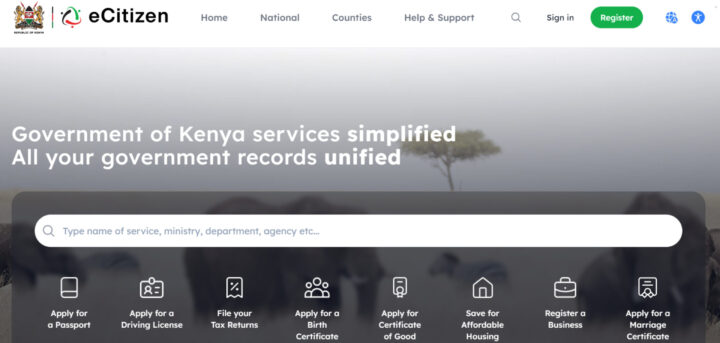
Kenya’s e-Citizen platform
As we didn’t realize this was our only option for paying our park fees, we had to figure out how to get this set up after we had already arrived at the park’s entrance gate.
Thankfully, we had a local SIM card and managed (though just barely!) to find enough service to connect, download the app, and fill out our information. But it was slow and we had some tech issues, so we lost about an hour getting everything set up.
Basically, here’s how you can download and register yourself on e-Citizen to pay your Kenyan national park entrance fees:
- Go to the link here or search for “e-Citizen Kenya” in your app store if you prefer to use your phone.
- Click “Register” and then select the final option “Foreigner: For Visitors to Kenya.”
- Go through the sign-up process by adding in your document details, a photo, etc.
- Once your account has been approved, log back in and click on the “Services” tab.
- Scroll down until you see “Kenya Wildlife Services (KWS).”
- Choose the national park or nature reserve you want to visit.
- Put in how many adults and children you need tickets for.
- Select your payment method (M-Pesa or credit/debit card).
- Save your proof of payment to show at the park gates.
- Enjoy!
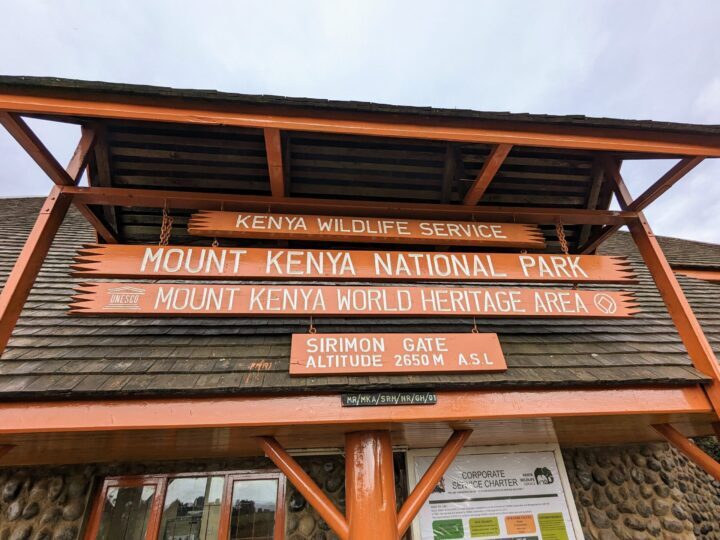
STEP #2: HEAD TOWARDS THE SIRIMON PARK ENTRANCE GATE.
Assuming you have proof of your paid entrance fee, it’s time to make your way to Sirimon Gate.
This entrance is roughly a 35-minute drive from Nanyuki, a nearby town (and likely where you’ll be spending the night before/after your hike) that’s known as the gateway to Mount Kenya.
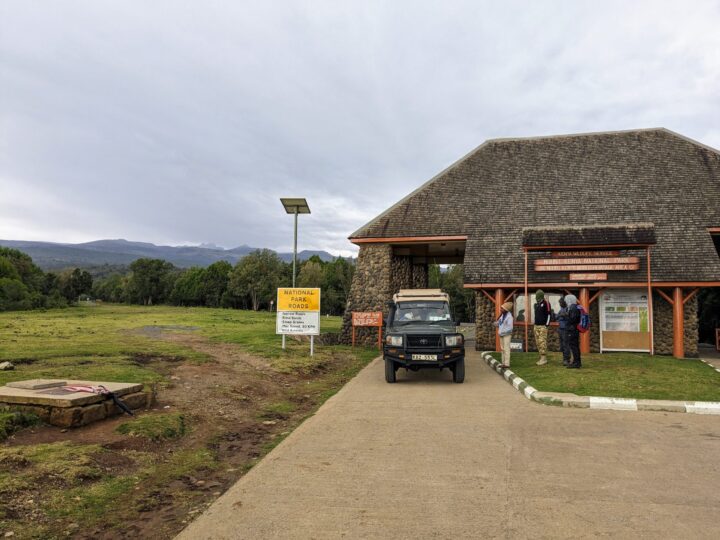
The Sirimon Gate entrance, Mount Kenya National Park
Personally, we had a rental car, so we drove ourselves to the gate. (That said, renting a car in Kenya is NOT for the faint of heart, so I definitely don’t recommend it for everyone.)
Alternatively, you can grab a taxi.
Or if you want to try a bus & moto taxi combo, I heard you can take a matatu from the Nanyuki bus station heading toward Timau.
From there, you can get off near the gravel road that leads to Sirimon Gate (you should be able to see this pretty easily on Google Maps) and can ask any one of the moto-taxis waiting to take you the 9 km up to the gate. This shouldn’t cost you more than a few dollars, though be prepared to negotiate and stay firm.
STEP #3: IF YOU PLAN TO HIKE INDEPENDENTLY, SPEND A FEW MINUTES ARGUING WITH THE ENTRANCE STAFF ABOUT WHETHER OR NOT YOU NEED A GUIDE. (AND IF YOU ACTUALLY DECIDE YOU WANT A GUIDE, THEN THIS IS A GOOD PLACE TO ASK.)
I’ll be honest here: the entrance gate staff were NOT happy about letting us through to do a day hike independently.
Apparently, day hikes aren’t that common, and it took quite a bit of arguing before the woman we were talking to let us through only after we promised her we’d be back way before dark (about 6:00 PM).
So if you also want to hike without a guide, the best thing I can recommend is that you stand firm and tell them that you know you can legally hike without a guide as long as A) there are two or more people (so no, you can’t hike totally alone I’m afraid!), and B) you aren’t going to be spending the night inside the park.
Note that, if you decide that you’d rather have a guide for your day hike, this is a good place to ask, and the park staff will point you to someone.
Usually, there are a handful of guides waiting by the entrance who, we were told, would accompany you for the very reasonable price of $15-20 USD per day. (Note that the ones at this price don’t seem to do much “guiding” as their English skills may vary and they are mostly just there to make sure nothing terrible happens.)
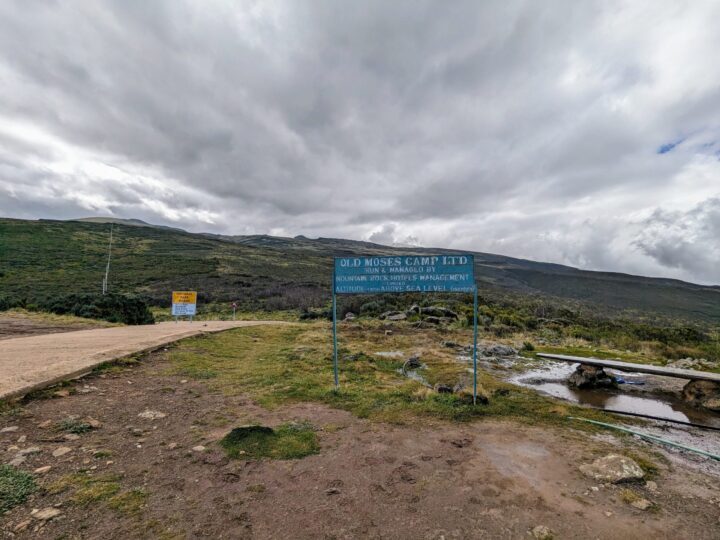
STEP #4: MAKE YOUR WAY TO OLD MOSES CAMP AT 3,000+ METERS.
From the entrance gate, your next task will be to make your way to Old Moses Camp – the simple mountain hut at 3,000+ meters where most summit hikers spend the night to acclimate to the elevation.
Note that it’s also possible to sleep here yourself if you like!
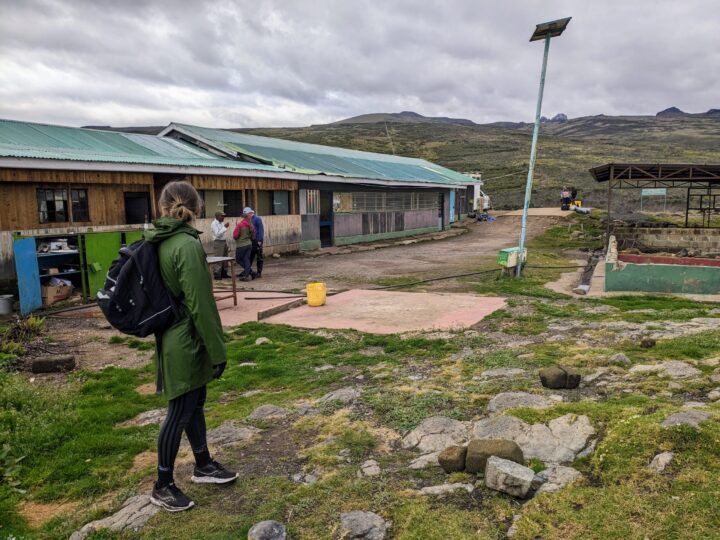
Old Moses Camp: the start of your hike in Mt. Kenya National Park
As far as we can tell, walk-up reservations are possible (though we didn’t get the price, unfortunately). However, accommodations are quite rustic and no food is available, so you’ll have to bring all your own supplies.
Old Moses Camp is located about 9 kilometers/5.5 miles up a dirt road from Sirimon Gate.
Technically, you could walk up this if you like for greater acclimation to the altitude. That said, given that you only have time for a day hike, we don’t personally think this is the most interesting part of the trail or the best use of your time.
In which case, I’d recommend trying to hitch a ride (which you’ll most likely have to pay at least a little bit for) from someone near the entrance gate.
Personally, we drove our rental car up. But as I mentioned above, we didn’t have a good experience renting a car and would avoid it if we ever went back to Kenya.
STEP #5: BEGIN HIKING UP THE HILL BEHIND OLD MOSES (THERE’S JUST ONE TRAIL SO YOU CAN’T REALLY MISS IT…THOUGH ASK AROUND IF YOU’RE NOT SURE!) TOWARD THE SATELLITES OF THE METEOROLOGICAL STATION.
Here’s the hill you’ll start making your way up:
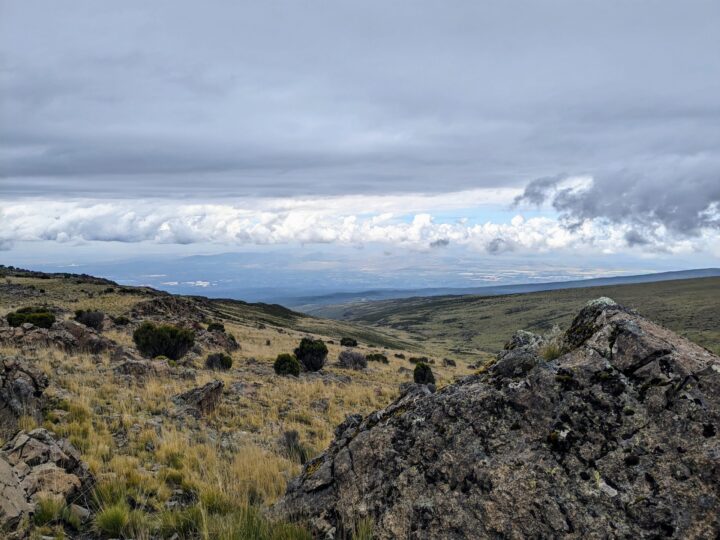
And here are some of the surrounding views of the valley you’ll be able to enjoy along the way:
It’s worth mentioning that, as you start making your way up the hill, you may once again need to fend off another person or two who wants to convince you that it’s “not safe” or “not allowed” to hike independently…and that you should probably just pay them to be your guide instead.
(We’re speaking from experience, here, as one guy started running up the hill to find us before we managed to reassure him that we really were just fine and weren’t going far!)
STEP #6: CONTINUE FOLLOWING THE TRAIL UP, UP, UP. AND WHEN YOU SEE THIS SIGN, GO LEFT.

STEP #7: MAKE IT TO THE TOP OF THE FIRST RIDGE, THEN CROSS THE VALLEY TOWARDS THE NEXT RIDGE YOU SEE IN THE PICTURE BELOW.
STEP #8: MAKE ONE LAST UPHILL PUSH TO THE TOP OF THE RIDGE TO REACH “THE VIEWPOINT.”
Unfortunately, the clouds came out at the last minute to block our view of the peaks. Though we still enjoyed our hike, fingers crossed you get a clearer day!
STEP #9: TAKE A BREATHER, EAT SOME SNACKS, ENJOY THE VIEWS OF THE PEAKS…THEN HEAD BACK DOWN THE WAY YOU CAME.
Heading back down the way you came
In conclusion…
And that’s it for today’s article!
If you have any questions about the Mt. Kenya hike we’ve shared above, or about visiting Kenya in general, leave us a comment below and we’ll get back to you.