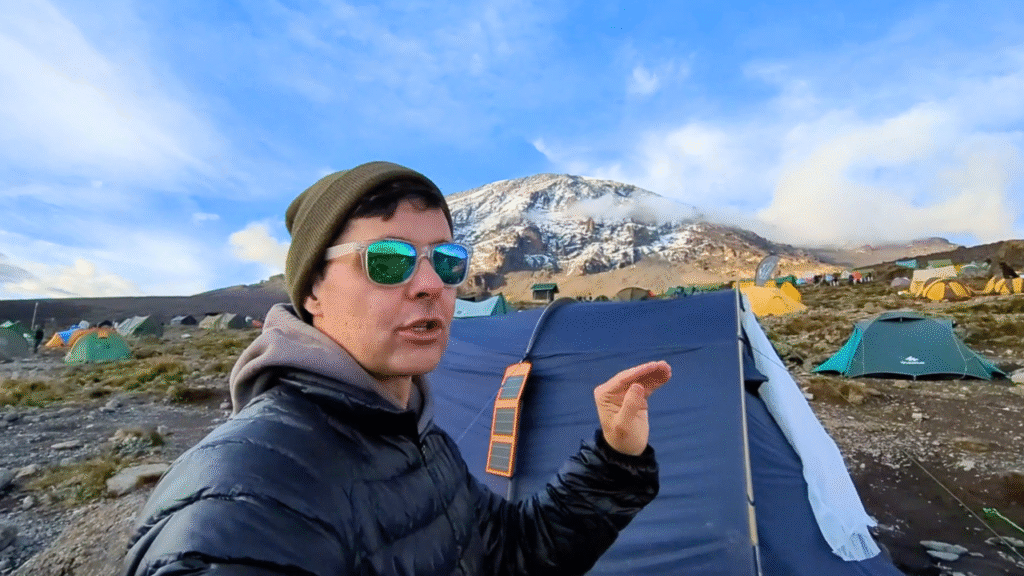
Standing on the roof of Africa had been sitting on my bucket list for years, but nothing truly prepares you for the reality of staring up at Mount Kilimanjaro in person. At 5,895 meters (19,341 feet), this massive stratovolcano in Tanzania is the highest free-standing mountain on the planet. Scaling it is an incredible physical challenge, a psychological test, and one of the most rewarding outdoor adventures you can experience.
If you are planning to take on this legendary peak, here is my complete day-by-day experience trekking the famous Machame Route, along with the insider tips I wish I had known before lacing up my boots.
Pre-Trek Strategy: Budget Transfers and Preparation
Before setting foot on the mountain trail, your journey begins with smart logistics. While most travelers book expensive direct flights into Kilimanjaro International Airport in Tanzania, there is a budget-friendly alternative that can save you significant money.
By flying into Nairobi, Kenya, you can easily catch an affordable six-hour cross-border bus down to Arusha or Moshi. Arusha serves as a fantastic hub for organizing post-climb wildlife safaris, while Moshi sits right at the base of the mountain, making it the most convenient staging ground for your trek.
Taking two full rest and acclimatization days in Moshi before starting the climb is crucial. Use this time to buy extra hydration gear, test your gear layout, and attend the mandatory crew briefing.
Key Preparation Tips:
- Strict Weight Limits: Mountain porters carry the vast majority of your gear, but local guidelines strictly cap duffel bag weights at 15 kilograms (around 33 pounds). Keep extra town clothes stored at your hotel to avoid overweight fees or forcing porters to carry illegal loads.
- Hydration Gear Rules: Disposable plastic water bottles are completely banned inside the national park to prevent littering. Bring durable, reusable water bottles or heavy-duty hydration bladders capable of holding at least 3.5 to 4 liters of water daily.
- Medication Considerations: If you plan on taking altitude medication like Diamox to prevent acute mountain sickness, remember that it acts as a diuretic. You will need to consume even more fluid than usual to stay properly hydrated.
Day 1: Rainforest Trails to Machame Camp
The adventure starts at the Machame Gate. The air here is warm, humid, and filled with the chatter of excited trekkers and hard-working mountain crews loading supply bags.
The first stretch takes you straight into a lush, dense tropical rainforest. The trail winds through massive green canopies, moss-draped branches, and muddy pathways. Keep your eyes peeled up in the trees; you might spot black-and-white colobus monkeys swinging through the upper branches.
Because the lower elevations are warm, wearing lightweight shorts and comfortable trail shoes is often fine for the first day. However, muddy conditions mean waterproof gaiters or sturdy boots are a smart choice if rain kicks in early. After roughly five to six hours of steady uphill walking, you reach Machame Camp, located right at the upper edge of the forest line.
Day 2: Navigating the Moorland to Shira Camp
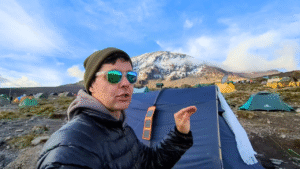
Waking up early to clear skies reveals your first unobstructed view of Kilimanjaro’s snow-capped summit rising far above the clouds. Day two transitions rapidly out of the rainforest and into the striking moorland zone, characterized by lower shrubs, rocky ridges, and sweeping vistas.
The path becomes steeper and significantly rockier. This section of the hike requires a slow, deliberate pace. Local guides constantly emphasize the golden rule of high-altitude trekking: Pole, Pole (pronounced poh-lay poh-lay), which means “slowly, slowly” in Swahili. Conserving your leg strength early on is the single best way to ensure you reach the summit days later.
By mid-afternoon, you arrive at Shira Camp situated on a vast, windswept high-altitude plateau. The temperature drops dramatically as soon as the sun dips below the horizon, bringing freezing night winds.
Camp Hygiene and Power Tip:
- The Baby Wipe Shower: There are no hot showers on the mountain. Hot water basins are sometimes provided for basic face washing, but a generous supply of heavy-duty wet wipes is your absolute best friend for staying clean over a seven-day trek.
- Solar Charging: Cold temperatures drain camera and smartphone batteries rapidly. Strap a lightweight, portable solar panel to the back of your daypack while walking to keep your power banks continuously charged during the daytime.
Day 3: Acclimatization at Lava Tower and Descent to Barranco
Day three follows a classic high-altitude mountaineering strategy: climb high, sleep low. The trail climbs steadily across a stark, alpine desert landscape up to the famous Lava Tower, a massive volcanic rock formation standing at 4,600 meters (15,091 feet).
Reaching Lava Tower is tough. The air gets noticeably thinner, breathing becomes heavier, and light headaches are common. Stopping here for a warm lunch gives your body a controlled dose of high elevation, triggering crucial red blood cell production.
After lunch, you descend about 600 meters down into the beautiful Barranco Valley. Dropping down to sleep at a lower altitude allows your body to process the high elevation exposure without subjecting you to extreme altitude sickness overnight. The landscape here is stunning, filled with unique giant senecio trees that look like something straight out of a fantasy novel.
Day 4: Conquering the Barranco Wall to Karanga Camp
Many hikers view day four as the most thrilling part of the Machame Route. Right out of camp, you face the formidable Barranco Wall—a near-vertical 257-meter cliff face of scrambled rock.
While it looks intimidating from below, climbing the wall does not require technical mountaineering gear. It does, however, require using your hands, keeping your balance, and carefully negotiating narrow rock ledge bottlenecks. Trekking poles should be stowed securely inside your backpack for this section so your hands remain completely free to grip the rock face.
Once over the top of the wall, you are rewarded with jaw-dropping views of the summit glaciers above and the cloud layer far below. A series of undulating valleys leads you into Karanga Camp, where you spend the afternoon resting, stretching, and carbo-loading for the final push.
Day 5: The Push to Base Camp (Barafu Camp)
The trek from Karanga to Barafu Base Camp (4,673 meters / 15,331 feet) is relatively short in distance but physically demanding due to the thin air and steep incline. The landscape turns entirely alpine desert—barren, rocky, exposed, and cold.
Arriving at Barafu Base Camp by early afternoon is essential. The camp is perched on a ridge of dark volcanic scree. Here, the immediate focus shifts entirely to preparation for summit night. You undergo vital signs checks, double-check your thermal layering systems, organize your headlamps, and try to get a few hours of fitful sleep before an extremely early wake-up call.
Day 6: Summit Night and the Long Descent
The summit bid begins around 11:00 PM under a blanket of freezing pitch-black darkness. Dressing in complete windproof and insulated layers is vital, as temperatures near the top drop well below freezing with biting winds.
The hike up from Barafu to the crater rim is a continuous, six-hour slog up steep, loose volcanic scree. Step by step, moving at a ultra-slow pole, pole pace, you follow the line of headlamps winding up the mountain face. Mental fortitude is everything during these dark hours.
The Magic of Uhuru Peak
Just as dawn breaks, you reach Stella Point (5,756 meters) on the crater rim, where the rising sun paints the sky in brilliant hues of gold and pink above a sea of clouds. From Stella Point, another 45 to 60 minutes of gentle rim walking past giant, ancient glaciers brings you to Uhuru Peak (5,895 meters / 19,341 feet)—the highest point in Africa. Standing next to the iconic wooden summit sign makes every grueling step completely worth it.
The Return Journey
After spending 15 to 20 minutes taking photos and soaking in the accomplishment, the long descent begins. Sliding down the loose scree back to Barafu Camp is tough on the knees, making sturdy trekking poles an absolute lifesaver. After a brief one-hour rest and meal at base camp, you pack up and continue descending all the way down to Mweka Camp, completing nearly 16 hours of near-continuous trekking in a single day.
Day 7: Final Descent through Mweka Gate
The final morning involves a pleasant four-hour walk down through the lush lower forest canopy to Mweka Gate. Returning to oxygen-rich air, warm temperatures, and green surroundings feels like entering a completely different world.
At the gate, trekkers receive their official park certificates—green for reaching Stella Point and gold for reaching Uhuru Peak. After tipping the incredible team of guides, cooks, and porters who make the expedition possible, a short vehicle transfer takes you back to Moshi for a well-deserved hot shower and celebration meal.
Essential Gear Tips for Climbing Kilimanjaro
- Footwear Rotation: Bring two pairs of shoes. Use broken-in, comfortable light hikers or trail runners for the rainforest and camp lounging. Use rigid, high-ankle waterproof boots for rocky trails and the freezing summit night.
- Layering System: Do not rely on one massive coat. Use a moisture-wicking base layer, a warm fleece middle layer, a packable down jacket, and a heavy windproof/waterproof outer shell.
- Protect Your Hands and Feet: Sub-zero summit temperatures mean heavy insulated gloves and high-quality wool socks (sometimes wearing two pairs) are mandatory to prevent frostnip.
- Hydration Protection: Water bladders and hose tubes freeze rapidly on summit night. Insulate your water hose or carry insulated thermal metal flasks stored deep inside your daypack.
Climbing Kilimanjaro is a challenging journey, but with proper preparation, respect for the altitude, and the right mindset, reaching Uhuru Peak is an unforgettable adventure that will stay with you forever.